We have states layer we want to use for selecting and exporting features from other layers that are within a selected state from the states' layer.
To achieve this task, we need to have basic understanding of the following:-
- Working with os and pyqgis module
- Read all layers listed on the layer's panel
- Understand how to get path to layer
- Make selection on layer
- Export selected features to new shapefile
Lets talk about each of the above separately.
Understanding how to work with OS and PyQGIS modules
One of the commonly used modules in python is the Operating System (OS) module. It provides functions for interacting with the operating system. Specifically in this task we will use the os module to get the base name of a shapefile from a given path.
Let say the shapefile path is this:
"C:\Users\`HYJ7\Desktop\NG_Admin.shp"
Then this will return its base name as 'NG_Admin.shp'
import os
os.path.basename(r"C:\Users\`HYJ7\Desktop\NG_Admin.shp")
Check the "dir(os)", you will see that we can do a lot more than the above including the following;-
'DirEntry', 'F_OK', 'GenericAlias', 'Mapping', 'MutableMapping', 'O_APPEND', 'O_BINARY', 'O_CREAT', 'O_EXCL', 'O_NOINHERIT', 'O_RANDOM', 'O_RDONLY', 'O_RDWR', 'O_SEQUENTIAL', 'O_SHORT_LIVED', 'O_TEMPORARY', 'O_TEXT', 'O_TRUNC', 'O_WRONLY', 'P_DETACH', 'P_NOWAIT', 'P_NOWAITO', 'P_OVERLAY', 'P_WAIT', 'PathLike', 'R_OK', 'SEEK_CUR', 'SEEK_END', 'SEEK_SET', 'TMP_MAX', 'W_OK', 'X_OK', '_AddedDllDirectory', '_Environ', '__all__', '__builtins__', '__cached__', '__doc__', '__file__', '__loader__', '__name__', '__package__', '__spec__', '_check_methods', '_execvpe', '_exists', '_exit', '_fspath', '_get_exports_list', '_walk', '_wrap_close', 'abc', 'abort', 'access', 'add_dll_directory', 'altsep', 'chdir', 'chmod', 'close', 'closerange', 'cpu_count', 'curdir', 'defpath', 'device_encoding', 'devnull', 'dup', 'dup2', 'environ', 'error', 'execl', 'execle', 'execlp', 'execlpe', 'execv', 'execve', 'execvp', 'execvpe', 'extsep', 'fdopen', 'fsdecode', 'fsencode', 'fspath', 'fstat', 'fsync', 'ftruncate', 'get_exec_path', 'get_handle_inheritable', 'get_inheritable', 'get_terminal_size', 'getcwd', 'getcwdb', 'getenv', 'getlogin', 'getpid', 'getppid', 'isatty', 'kill', 'linesep', 'link', 'listdir', 'lseek', 'lstat', 'makedirs', 'mkdir', 'name', 'open', 'pardir', 'path', 'pathsep', 'pipe', 'popen', 'putenv', 'read', 'readlink', 'remove', 'removedirs', 'rename', 'renames', 'replace', 'rmdir', 'scandir', 'sep', 'set_handle_inheritable', 'set_inheritable', 'spawnl', 'spawnle', 'spawnv', 'spawnve', 'st', 'startfile', 'stat', 'stat_result', 'statvfs_result', 'strerror', 'supports_bytes_environ', 'supports_dir_fd', 'supports_effective_ids', 'supports_fd', 'supports_follow_symlinks', 'symlink', 'sys', 'system', 'terminal_size', 'times', 'times_result', 'truncate', 'umask', 'uname_result', 'unlink', 'unsetenv', 'urandom', 'utime', 'waitpid', 'waitstatus_to_exitcode', 'walk', 'write'
On the other hand, PyQGIS is the QGIS Python API. It allows users to automate workflow and extend QGIS with the use of Python libraries. Specifically in this task we will use the following PyQGIS functions:-
QgsProject.instance().mapLayers()
QgsProject.instance().mapLayersByName()
.name()
.source()
.selectByExpression()
processing.run()
QgsProcessingFeatureSourceDefinition()
QgsVectorFileWriter.writeAsVectorFormat()
iface.addVectorLayer()
Read all layer listed on the layer panel
To read all layers listed on the layer's panel, use this function QgsProject.instance().mapLayers()
The function returns a dictionary of the layers which you can iterate over to perform further processing.
Get layer path
The .source() method is used to retrieve path to a layer. We need this specifically to export the selection we will make below and also to create file name and path to save the selected features.
Making selection
There are several ways to make selections. However, here we will make use of selectByExpression method and run the native selectbylocation in the processing.run method.
Exporting selected features
The selected features will be exported using the QgsVectorFileWriter.writeAsVectorFormat method.
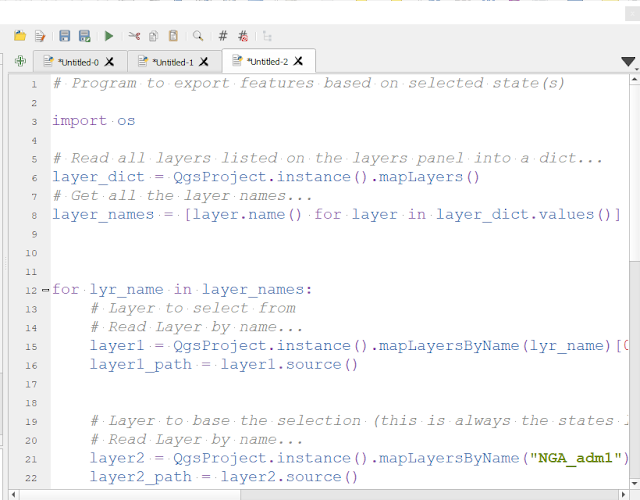
The final code
# Program to export features based on selected state(s)

import os

# Read all layers listed on the layers panel into a dict...
layer_dict = QgsProject.instance().mapLayers()
# Get all the layer names...
layer_names = [layer.name() for layer in layer_dict.values()]

for lyr_name in layer_names:
    # Layer to select from
    # Read Layer by name...
    layer1 = QgsProject.instance().mapLayersByName(lyr_name)[0]
    layer1_path = layer1.source()


    # Layer to base the selection (this is always the states layer)
    # Read Layer by name...
    layer2 = QgsProject.instance().mapLayersByName("NGA_adm1")[0]
    layer2_path = layer2.source()

    # Do selectByExpression on layer2...
    state = 'Benue'
    layer2.selectByExpression(f'"state_name" = \'{state}\'')

    # QGIS run processing script....
    processing.run("native:selectbylocation",
        {'INPUT':layer1_path,
        'PREDICATE':[6],
        'INTERSECT':QgsProcessingFeatureSourceDefinition(layer2_path, selectedFeaturesOnly=True, featureLimit=-1, geometryCheck=QgsFeatureRequest.GeometryAbortOnInvalid),
        'METHOD':0}
        )

    # Make file name...
    fn = state +'__'+ os.path.basename(layer1_path)

    # Save selected features to new shapefile...
    newfile_name = f'C:/Users/`HYJ7/Desktop/Working/Fiverr/2023/07-July/Clip All Layers/SHP/00/{fn}'
    writer = QgsVectorFileWriter.writeAsVectorFormat(layer1, newfile_name, 'utf-8', driverName='ESRI Shapefile', onlySelected=True)

    # To add the newly exported layer to map canvas...
    # iface.addVectorLayer(newfile_name, '', 'ogr')

print('Finished...')

That is it!


